

ColourMap
One of the problems with the WindowManager had been that it was not possible to render deep images with colour translations. For the paletted images, the colour translation tables could be created by the ColourTrans module (or created manually if you were so inclined). ColourTrans can use a transfer function in order to build translation tables, but these transfer functions aren't usable in any render operations themselves (that is, you could create a palette using one, but couldn't plot directly through the function). This meant that any deep images (16 and 32 bit-per-pixel) couldn't have any such colour translations.
It was important for the WindowManager to support these as, otherwise, it would be impossible to highlight or fade sprites (see the Desktop rambles, later, for more details and examples). The colour mapping functions that I created were based on the transfer function, and the AWRender colour mapping functions - as mentioned earlier in the section on DrawFiles. The rendering operations can be called with a colour map descriptor, which comprises a workspace pointer and a function pointer.
It is very useful to have the facilities to perform colour mapping, but there are a number of 'standard' colour mappings that you might want to perform, and probably don't want to write little bits of assembler each time. The first colour map uses were in the WindowManager which provides its own colour mapping functions for highlight and fade, but other places would need their own types of colour map. In particular, when I wanted to show photos, changing the brightness or gamma correction would be very useful.
The ColourMap module provides these functions. It started out with a simple 'blend' operation, which just blends colours towards another (fixed) colour. Later, other more complicated functions were added, to cover many of the common cases. The module allows you to build up these standard mappings into a single colour map descriptor. So you can apply a blend towards blue, and then increase the contrast of an image, if you want. The operations are accumulated in the workspace with any data necessary to apply the operation, and a function is returned which will step through the mappings in order to apply them to a colour.
I'm not completely happy with the interface to the ColourMap module. It seems that it isn't quite as easy to use as I had hoped. In particular it doesn't seem to be simple to determine the memory requirements of the workspace, which makes it a little unreliable to use if you're not careful. However, it did mean that there were some pretty fun effects that you could create quite easily using it.
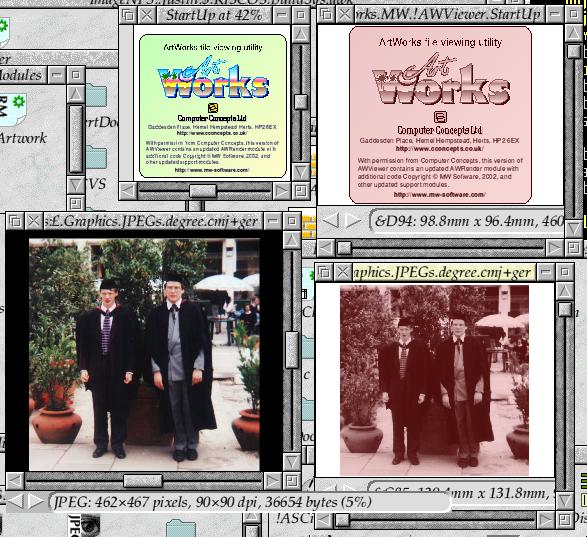
The main !ImgViewer application had support for applying colour maps to anything that it could render using the contrast and gamma correction mappings. I'm not sure that it was all that useful to people, but the ability to do so - and to do so easily - was what really mattered.
As the information about the location of the colour wasn't provided, any more complex operation, such as mapping the colours in a gradient or similar, wasn't possible. I didn't really consider this to be an issue - the amount of work necessary to do that across all rendering systems, compared to the gain, would be pretty low.
FontMap
The FontMap module was created primarily to help with the conversion of font names for the SVG conversion provided by the DrawFile module. However, I didn't want to restrict the mappings to only SVG. There are a few times when you need to perform font name conversions, and it would be useful if those conversions were handled in a centralised manner. The PostScript system had font mappings inside the printer definition files for RISC OS to PostScript font names. These also included encoding mappings because the fonts aren't exactly the same when it comes to some characters.
There are always going to be issues when trying to convert from one specification scheme to another, but I wanted the module to be as useful as possible without introducing great complexity to the system. I knew what the SVG font requirements were from having worked with its specification - it used CSS 2. CSS 2 was already a composite specification that had taken input from the various systems that existed, so was a good place to begin. I looked at the Windows documentation, and the painful specification that X used, for any areas that might need to be included. Mostly these were catered for by CSS 2. I'd previously looked at the Portable Font Resources as part of DAVIC, but they mostly involve the definition of fonts rather than their naming schemes. I also had a very brief look at PANOSE which is a quite complex font classification system - it's useful, but is far too complicated for what I was trying to achieve.
Anyhow, having looked at these and returned to the original problem, the CSS 2 specification covered most of what was needed, so I used it as the basis for the FontMap module. The main part that was omitted was the 'variant', which allows for 'small caps' forms of fonts. In theory, such a font could be created dynamically by the FontManager, but as no such dynamic creation was available in the current version, I left it out.
The module allows conversion of naming schemes between the different forms, using the properties specified by CSS 2 - the name, the weight (how bold or light the font is), the italic flag, and the stretch (how thick or thin the font is, horizontally). The weight and stretch are measured on a scale from 1 to 1000, with named definitions at each multiple of 100. The module would match the closest known variant to that requested.
A font mapping description file was used to configure the module. If none was supplied, a basic mapping file would be used which mapped the RISC OS fonts to their Windows equivalents, which would ensure that many common uses would come out at least in the same general style.
The conversion was similar to MimeMap in that it took a parameter for an alien format and converted it to the RISC OS form (and vice-versa). Unlike the MimeMap module, though, it could apply variations. For example, if you requested a conversion from RISC OS font 'Homerton.Medium' to a RISC OS type but also requested that it used weight 700 ('bold') it would produce 'Homerton.Bold'. Similarly, you could turn on or off the italic flag, to generate an italic variant. If an italic variant for a RISC OS font did not exist, it would use the matrix operations to create an oblique variant, which would suffice in most cases.
I had planned to expand the use of the FontMap, and add more specific conversions, for PostScript. It would have been nice to be able to have incorporated its font handling into the Font selection toolbox object. Similarly, I'd have liked to add options to the !Draw font selection for effects like 'bolder', or 'italic' on the menu, rather than forcing the full selection from the menu.
I have a feeling that the module was only used by the DrawFile export to SVG in the end, which is a bit of a pity as I think it could have been used in a few other things. Maybe !Mozilla could have used it! (no, maybe not)
VideoTTX
RISC OS was moving towards acceleration for its video system and whilst there were a lot of obvious features that needed to be updated, one thing that we still lagged in was support for Teletext. Because the Teletext implementation was deep in the Kernel's video system it wasn't going to be able to stay there as more APIs were abstracted out into separate modules. Additionally the existing implementation only supported 16 colour modes, and only at a resolution of 80x25 characters, 320x250 pixels. This meant that characters were 8x10 rather than the usual 8x8.
Most modern video systems only supported 256 colours modes or higher, so it wasn't going to be possible to directly support these 16 colour modes. Pace had partly addressed this issue previously by creating a higher resolution mode 7, using a larger font taken from those supplied within the !ZapFonts collection. Although I'd seen it when I worked there, it wasn't available to me afterwards and in any case it was proliferating the use of assembler that wasn't really sustainable in the long term. Plus, it's Teletext - its speed isn't really as big a deal as many other parts of the Kernel, but maintainability in the future is more important.
I began to write a complete implementation of the mode from scratch, using standard RISC OS calls. Using the standard calls was important, as it would make it possible to accelerate without special work, and it made the testing significantly easier. Teletext itself isn't that hard to render. There are 3 major features that you need to be able to do in order to make it work in a useful way:
- Graphics rendering.
Teletext graphics are a block of 2x3 rectangles which take up the space of a single character. The graphics can be drawn in any of the 8 colours that Teletext supports, and can be 'separated' - drawn as individual rectangles rather than flush with one another, forming a continuous shape with the characters to the sides, above and below. - Text rendering.
Text was generally the same as the standard ASCII character set, but there were a couple of changes to the standard. The three characters '#', '`' and '_' were swapped around, and there were some replacements - for example '[' was replaced by a left arrow. As with graphics, the text could be displayed in any of the 8 colours supported, and could also be 'double height'. - Control code processing on a per-line and multi-line basis.
The control codes manage the visual rendering of the text and themselves take up a character space. Because of the double height operations, control codes on a previous line could affect the current line.
Text rendering was pretty simple. Instead of providing a completely
different font for the mode, I chose to rescale the standard system
font. This meant that it wasn't really high resolution, but it would
work in any mode. As the standard graphics system can plot the system
font at any size, this isn't a problem for it. The character remapping
was a different matter - and not one that I tackled particularly well.
For the standard system font the characters could be swapped around or
made into something similar. For example, the vertical '='
sign was just rendered as a plain bar '|'. These were
areas that I planned on improving later but never got around it.
Graphics rendering was through the standard calls, using rectangle fills as appropriate to create blocks on the screen. Each character was a 2x3 grid where each cell could be coloured or not. The processing for an update would generate a bitmap across the screen that contained the cells that should be on or off (and some parameters to go with them, like whether the cells were separated or continuous, and their colours). Solid blocks of colour would be merged together to form horizontally biased rectangles of constant width - this merging together of the redraw would mean that they could be accelerated better, and would result in fewer HLine calls on non-accelerated hardware. Separated graphics were less efficient as every rectangle had to be drawn independently.
The entire graphics system in the Teletext implementation went through
a simple graphics context 'gcontext' that I'd previously used in the
ConvertWMF module. This allowed the primitive operations
to be replaced by other implementations at run-time. Initially the
implementation was only for the system font and standard graphics
operations. Because the operations were all abstracted and the whole
system used standard system calls it was both resolution and colour
depth independent.
Once I'd got an implementation that worked as an application - this was all written in C as a plain library, and had an application that could test it - I converted it to a module and added the necessary calls to the Kernel to operate on the Teletext state. Part of the fun that this involved was replacing almost the entire 'VDU Teletext' source with a far shorter and simpler file. At the same time, some of the other text rendering functions became simpler because they didn't have to special case operating in a Teletext mode.
The performance was still a little slow in places, so some of the operations were deferred to a subsequent VSync - this also meant that there was slightly less flicker as the screen updated. This wasn't too hard to do because the 'flashing' text already had to be handled periodically anyhow.
I was still a little disappointed to have the text in system font - it
negated part of the point of having a higher resolution. However,
there was a nice font already built in to the system, and a means
of rendering it - Corpus could be rendered through the
FontManager and would scale suitably, and was
anti-aliased. The 'gcontext' functions that handled text plotting
were duplicated to produce anti-aliased text.
These functions are disabled by default, but the user can select the 'high quality' mode by issuing a VDU sequence. Once enabled, the display updates to show the new fonts.
Of course part of the point of this was to allow a higher resolution mode to be used, so the old 320x250x16 colours mode was replaced with mode 28 - 640x480x256 colours. The first thing that I found when I began to use the new Teletext mode was... that no graphics worked. The reason was relatively simple, but rather forehead-slappingly obvious. Teletext modes don't have graphics, so I couldn't do the rectangle operations that I needed. I solved this by just allowing graphics operations in Teletext mode. It's a relatively simple change and the effects shouldn't be significant - graphics operations previously did nothing in Teletext modes, so it shouldn't hurt.
The other thing was that Teletext modes should be able to select the
number of characters they displayed. This meant that the width and
height of the screen in characters should be configurable - and there
was already an interface for that. During mode selection, mode
variables could be supplied to request the type of mode to select.
In particular you could set the 'Teletext flag' in the flags word,
and you could request the width and height in the 'ScrBRow' and
'ScrLCol' (bottom row and last column) variables. Whilst mode 7
did this for you, it would be necessary to do this manually if you
wanted such a mode - which wasn't as nice as using the mode strings
that we preferred.
As the mode strings had already been made into a nice interface in
the Kernel, it was relatively easy to update these so that they
supported the new Teletext modes. The depth of the mode was specified
with the 'C' or 'G' string, followed by
the number of colours, eg 'C256' for 256 colours,
or 'G16' for 16 greys. It seemed logical
therefore that 'T' be the specifier for 'Teletext',
and the number of colours be specified in the same way -
'T256' being a 256 colour
Teletext mode. As mentioned previously, this was important for newer
graphics hardware that would not support 16 colours, but also so
that the fonts could anti-alias properly.
The screen resolution remained in the 'X' and
'Y' strings (eg 'X800 Y600'), but new
strings were created for the text resolution, 'TX',
and 'TY', so you could request a different Teletext
resolution if you so desired.

Yellow River Kingdom, with system font
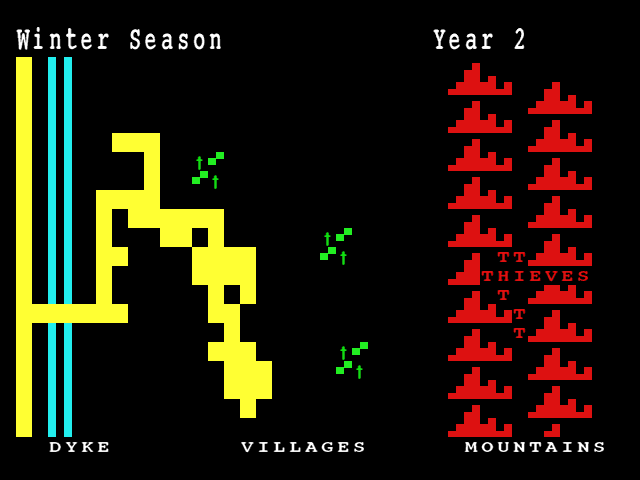
... and in high resolution
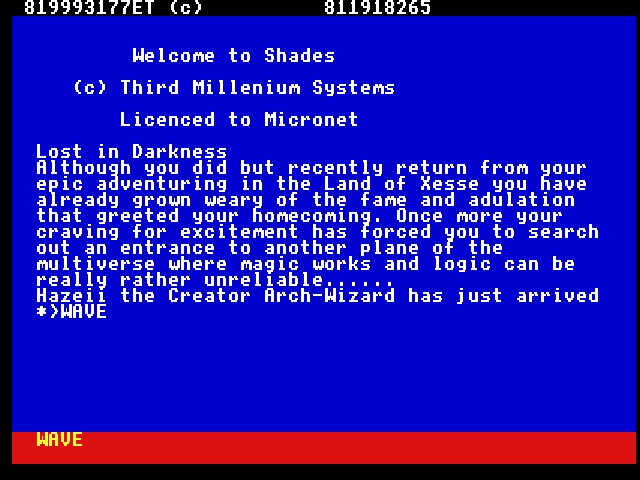
My Micronet Shades demo, in dull system font.
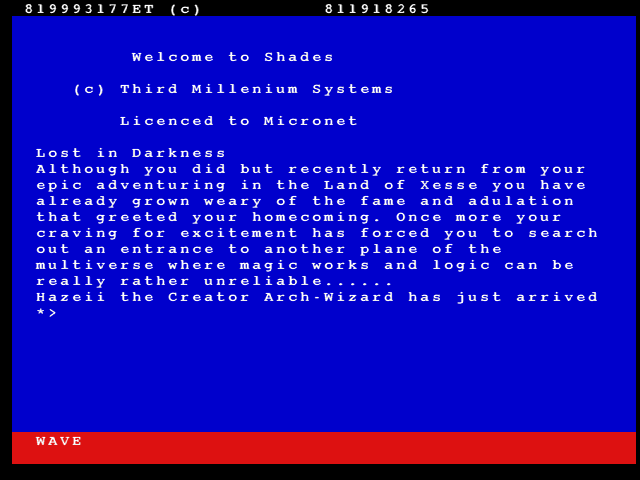
... and again in high resolution
The Shades images there are actually slightly different - they use
a Teletext mode 53x30 characters, with the mode string
'T256 X640 Y480 TX53 TY30', and my demo code (which
I originally created for the BBC and still works reasonably well)
slightly modified to be aware that the screen is bigger than it
expects.
The Teletext implementation still had a few problems, and could have been sped up a little. For the most part, though, it did a reasonable job of making the modes work, which was a requirement for people upgrading. Whilst many people would never use it, it was generally perceived that the lack of a feature was worse than a feature that had changed slightly. Reducing the number of 'removed features' reduced the perception of lesser functionality. In general it seemed that removed features massively outweighed any gains in other areas, even when those features were rarely used, or detrimental to the whole.
Borders
I wanted to do something outside of the usual, and to make a useful tool for people to use. RComp had taken over the development of the !DataPower database, which rekindled an idea I'd had previously. Long ago when I had used !Poster, I'd loved the way that it had implemented borders. They were both very simple to use, and very flexible. The borders were made up of different components for the edges and corners, and had rules to change how they were affected when scaled up. This gave made them very useful for their intended purpose - surrounding posters and diagrams.
After !Poster, the technology had been used in !DataPower which gave an opportunity to provide it elsewhere. I like the idea that components can be reused for other applications, so I put forward a proposal to RComp for a simple project to create a new module - 'Borders' - which could be used with the !Borders resource.
RComp agreed (which was incredibly good of them) and provided the sources, and the support I needed when things were unclear. It was really quite an exciting little project, and made for a nice break from other work, because I had set out early on exactly what I wanted to do and how I was going to do it. That's a great advantage of having a very self contained project, as opposed to the other more flexible projects that I undertook.
The module had a very simple API, because at the time (around 2003) I wanted it to be easy to use, and able to be used in other places. The module could render to the screen (which was pretty much a prerequisite!), or could generate DrawFiles in memory or on disc for the border. This allowed it to be written in a format that allowed it to be drawn without having to have the original module available.
REM Render a border direct to the screen
REM Afterward, plot some lines where the bounds are
DIM box% 16
box%!0=256
box%!4=256
box%!8=768
box%!12=768
size%=64
tint%=-1
scale%=1<<16
SYS "Borders_Render",1<<0,"Original.Dragon",box%,size%,tint%,scale%
RECTANGLE box%!0, box%!4, box%!8-box%!0, box%!12-box%!4
RECTANGLE box%!0-size%, box%!4-size%, box%!8-box%!0+size%*2, box%!12-box%!4+size%*2
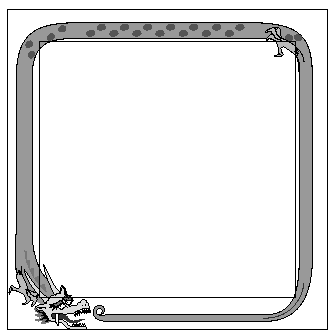
The border is allowed to enter the box it is surrounding.
In the notes, I'd left some comments about wanting to make it usable from within !ArtWorks, and whether if should have an interface to ImageFileRender for bordering rendered objects. There were also notes about how the colour mapping should work. The original specification allowed only for tinting of the image, which would work well with monochrome images, but not for coloured ones. The matrix transformation was a little odd, because it would scale the output from the border process. That makes sense, as it preserves the content (and its total bounding box), but it means that the border isn't the best it could be - it is purely scaled, rather than being duplicated.
In the end it was nearly complete, with only a few things missing.
Disclaimer: By submitting comments through this form you are implicitly agreeing to allow its reproduction in the diary.